
Getting Started
Purpose
This guide shows you how to get Yamcs up and running with Maven. Maven is a popular Java build tool available in most package repositories.
The base features of Yamcs do not require Java knowledge, however as soon as you dive into custom data links and other extensions, you will need a build tool anyway.
Prerequisites
- Java 17+
- Maven 3.1+
Project Setup
Clone the quickstart repository to kickstart a minimal Yamcs project:
git clone https://github.com/yamcs/quickstart.git myproject
This will generate a project structure in the following way:
myproject/
|-- README.md
|-- pom.xml
|-- simulator.py
|-- src
|   `-- main
|       |-- java
|       |   `-- com
|       |       `-- example
|       |           `-- myproject
|       |               |-- MyCommandPostprocessor.java
|       |               `-- MyPacketPreprocessor.java
|       `-- yamcs
|           |-- etc
|           |   |-- processor.yaml
|           |   |-- yamcs.myproject.yaml
|           |   `-- yamcs.yaml
|           `-- mdb
|               `-- xtce.xml
`-- testdata.ccsds
- Custom Java classes (if any) go into
${project.basedir}/src/main/java/. - Yamcs configuration goes into
${project.basedir}/src/main/yamcs/in subfoldersetc/andmdb/.
The file pom.xml is the entrypoint for subsequent Maven builds. It adds dependencies to the desired Yamcs modules. At least a dependency to yamcs-core is required. yamcs-web is another common dependency that makes Yamcs host a prebuilt copy of the Yamcs web interface.
<dependencies>
  <dependency>
    <groupId>org.yamcs</groupId>
    <artifactId>yamcs-core</artifactId>
    <version>${yamcsVersion}</version>
  </dependency>
  <dependency>
    <groupId>org.yamcs</groupId>
    <artifactId>yamcs-web</artifactId>
    <version>${yamcsVersion}</version>
  </dependency>
  ...
</dependencies>
Running Yamcs
To now run your Yamcs application:
cd myproject/
mvn yamcs:run
By default, Yamcs will run from the target/yamcs/ directory.
View the Yamcs web interface by visiting http://localhost:8090
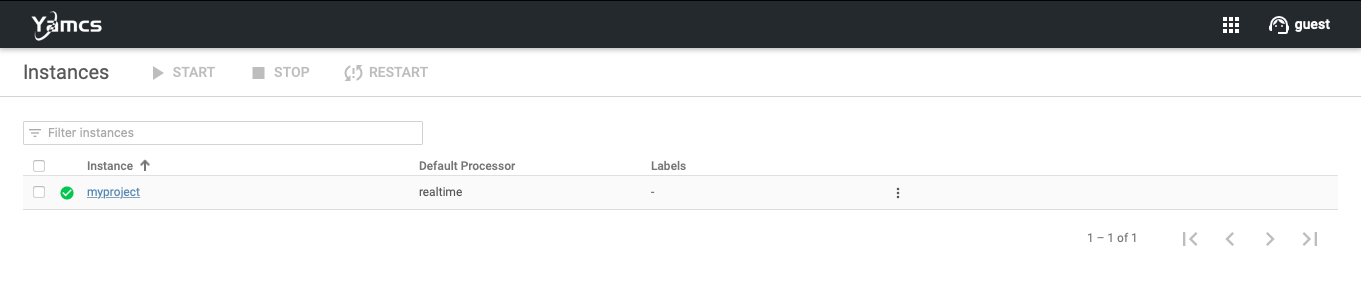
The homepage shows you the available instances. Each instance corresponds to a separate database with custom Yamcs configuration. In this example we have just a single instance called myproject. In more advanced scenarios, you could use instances to group data by simulation session, mission environment or any other criteria.
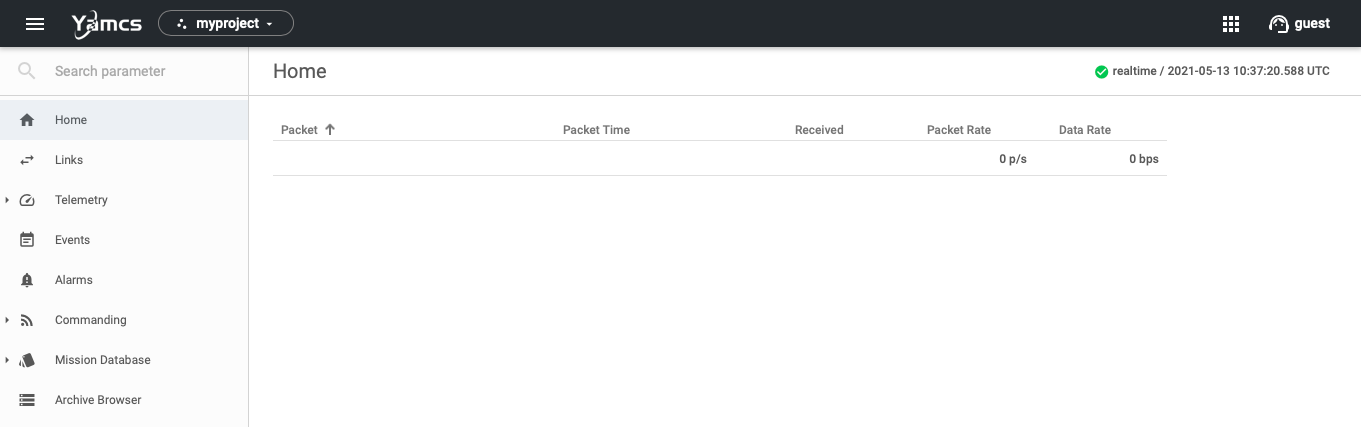
If we now navigate to the main page for our myproject instance, we see not much going on.
So let's liven things up a bit by pushing telemetry packets to Yamcs. In another terminal:
python simulator.py
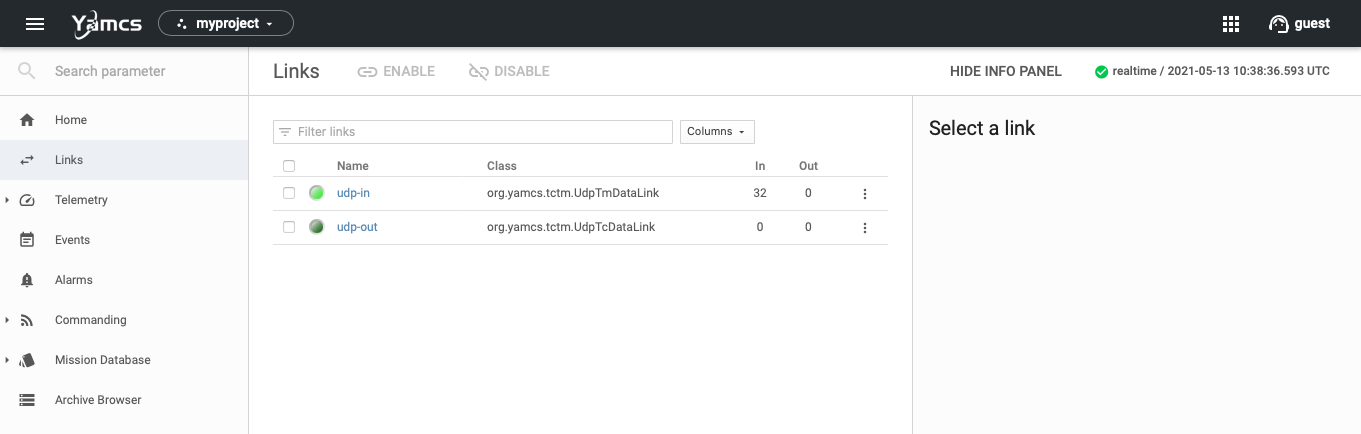
This Python script simulates a space system that emits packets at 1 Hz. Each packet is put in a UDP frame and sent to the port 10015 on localhost. This port is bound to by the udp-in link of Yamcs. You can monitor this link from the Links menu item of the myproject instance. The counter increases with each incoming packet.
Navigate to Telemetry > Parameters to see the individual parameters that are being extracted from the received packets.
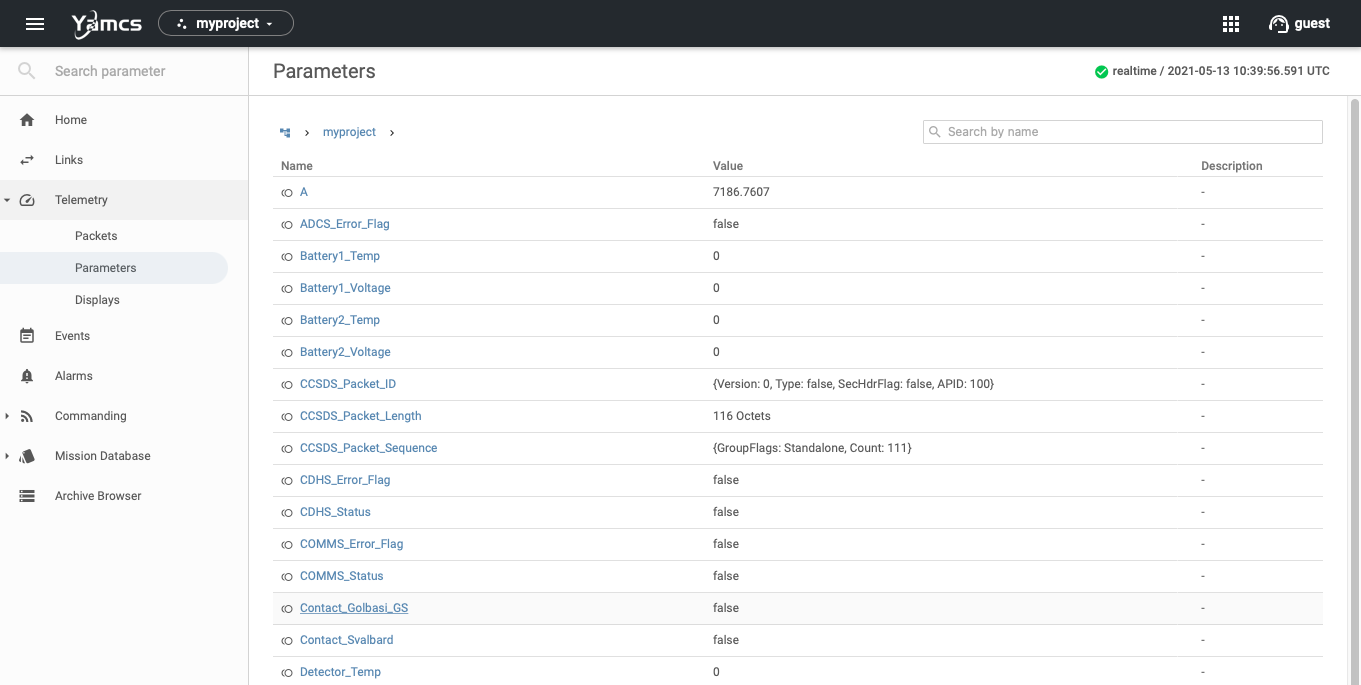
Yamcs knows how to decode packets into parameters by applying the definitions contained in a Mission Database (MDB). We can explore the applicable definitions of our example project by navigating to the pages under the MDB menu item:
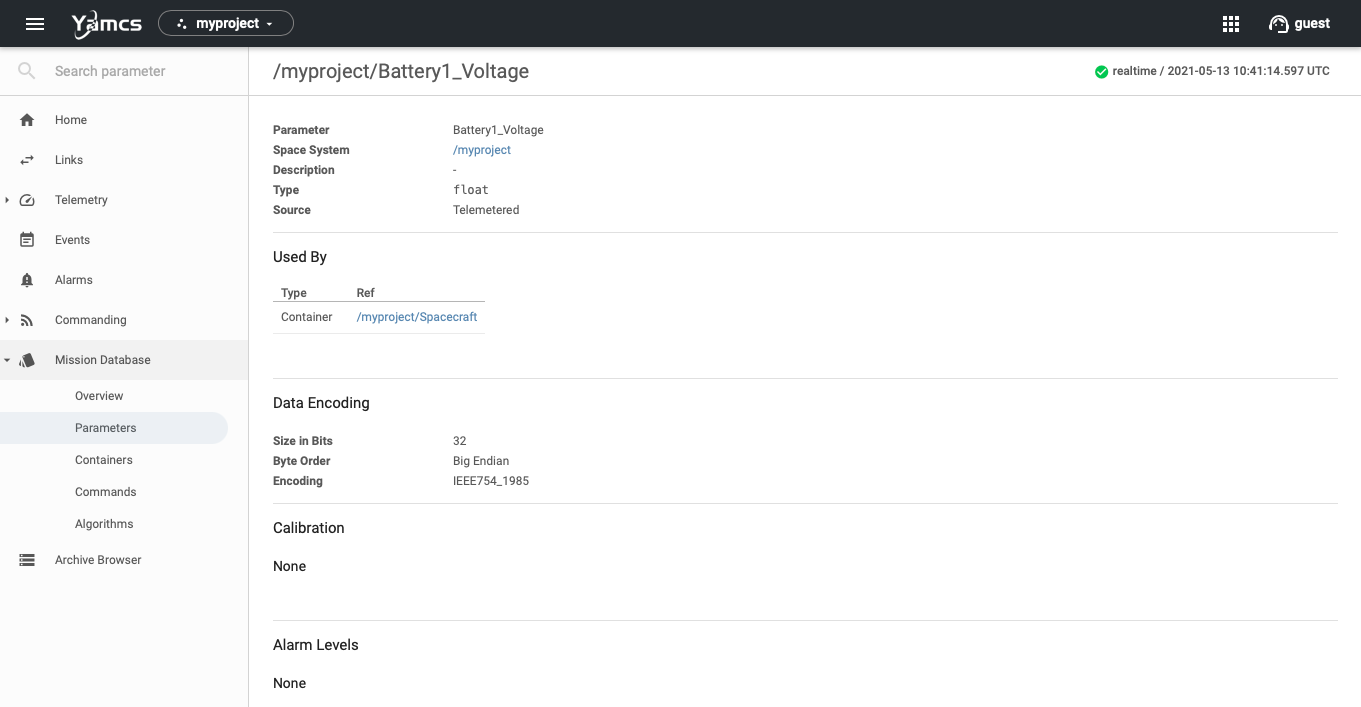
The Mission Database describes not only how to decode incoming telemetry, but also describes how to encode outgoing telecommands.
So let's send one of these telecommands. Navigate to Commanding > Send a command and choose one of the available commands.
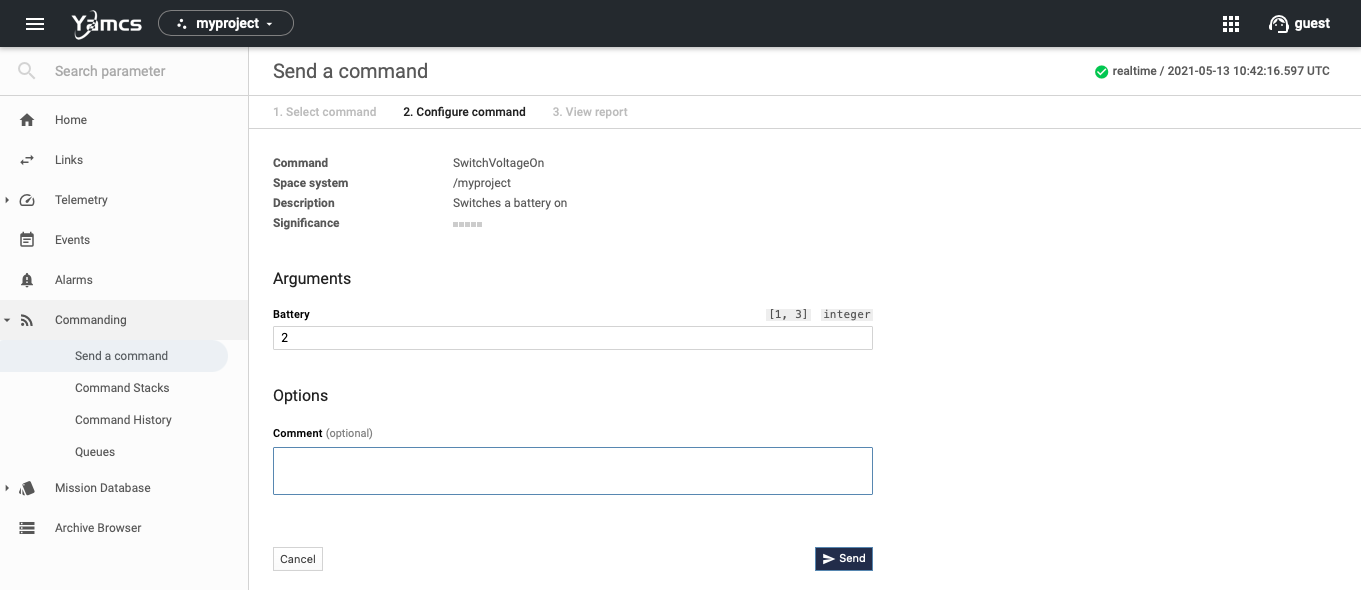
When you have provided all command arguments, press Send. This will forward you to the individual report for that command:
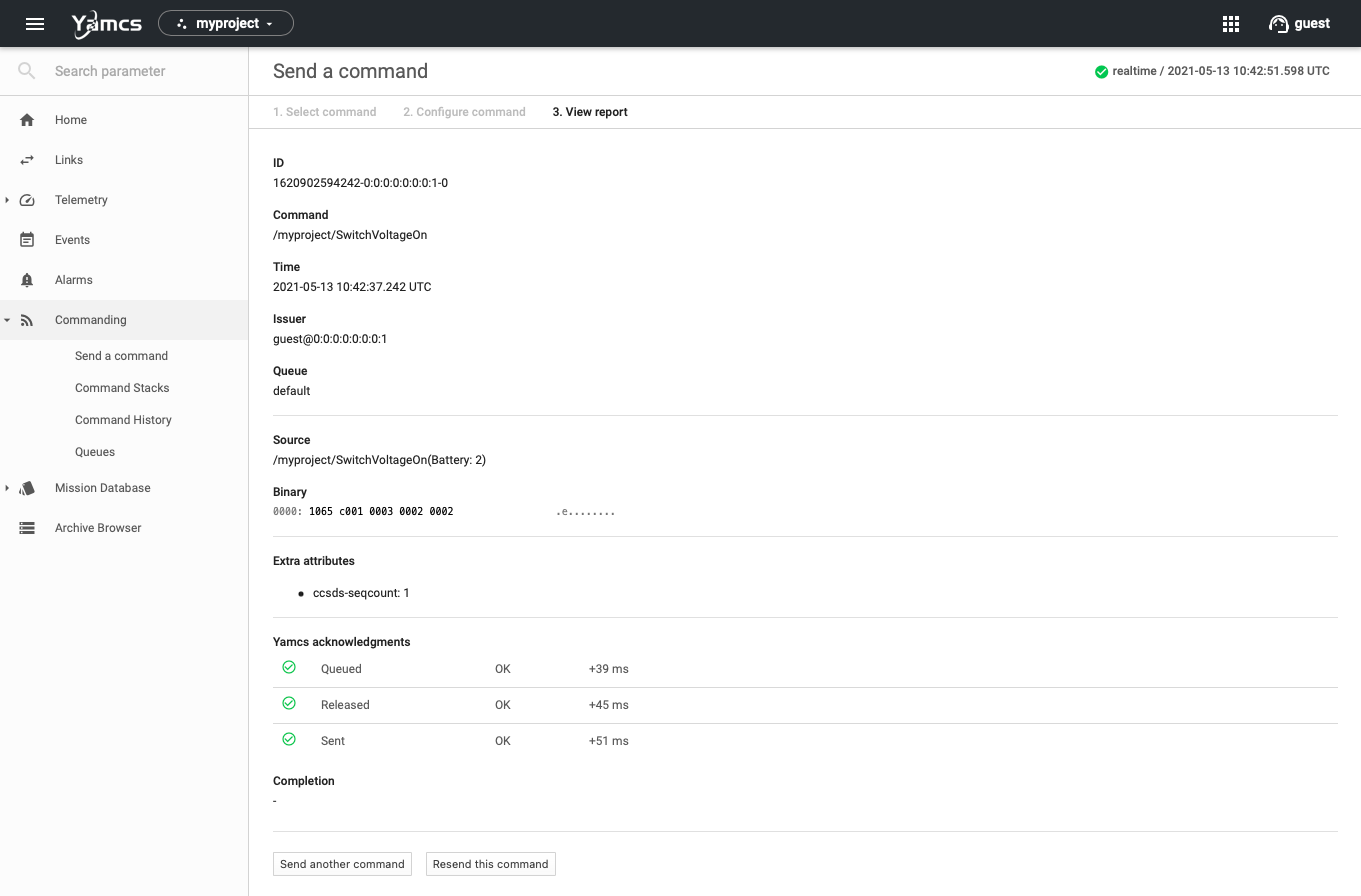
We see acknowledgments that indicate that Yamcs has successfully written the command on the network channel. In the output of the simulator we see that the command was received. The simulator runs its own UDP server on port 10025. Yamcs knows how to submit commands to the simulator because of the link udp-out. If we navigate back to the Links page, we see its out counter has increased by one.
This concludes the overview of Yamcs basics: sending commands, and receiving telemetry.
Configuring Yamcs
Yamcs is configured through a set of Yaml configuration files. Yaml is a popular format, which despite the name similarity, is otherwise unrelated to Yamcs.
The main entrypoint is the file src/main/yamcs/etc/yamcs.yaml
...
dataDir: yamcs-data
instances:
  - myproject
...
The dataDir property specifies the folder where Yamcs will persist data such as received telemetry. In this example we use a relative directory which resolves to target/yamcs/yamcs-data. This means that when we do mvn clean, all of our data will be removed. That may be acceptable for development purposes, but if you want to preserve received data, it's better to use an absolute path somewhere on your file system.
The instances property contains a list of predefined instances that are started by Yamcs. In this example we only require one instance.
For each instance there must be a matching file yamcs.[instance].yaml that contains instance-level configuration instructions. In our example project we have a file yamcs.myproject.yaml
services:
  - class: org.yamcs.archive.XtceTmRecorder
  - class: org.yamcs.archive.ParameterRecorder
  ...

dataLinks:
  - name: udp-in
    class: org.yamcs.tctm.UdpTmDataLink
    stream: tm_realtime
    port: 10015
    packetPreprocessorClassName: com.example.myproject.MyPacketPreprocessor

  - name: udp-out
    class: org.yamcs.tctm.UdpTcDataLink
    stream: tc_realtime
    host: localhost
    port: 10025
    commandPostprocessorClassName: com.example.myproject.MyCommandPostprocessor

mdb:
  - type: xtce
    args:
      file: mdb/xtce.xml

...
The services property contains a list of services that activate optional functionalities on this instance. In the example, there are services for recording. If they were not specified, Yamcs would only serve realtime data and not archive telemetry.
The dataLinks property contains a list of available data links. Here we use two UDP-based link types that are included in yamcs-core.
-
The link
org.yamcs.tctm.UdpTmDataLinklistens to TM on the configured port. A packet preprocessor is configured. This component establishes metadata for each packet binary (packet time, sequence count), and is able to drop packets before they go any further (for example, because a checksum failed). -
The link
org.yamcs.tctm.UdpTcDataLinksends TC to the configured address. A command postprocessor is configured. This component intercepts commands before the link will send them out. The typical use case is to modify command binary with a sequence count, or to insert the correct packet length.
The mdb property describes how the Mission Database is constructed. The word database is a bit of a misnomer, since Yamcs will build an in-memory instance-level MDB on startup based on the configured components. In this example Yamcs will read all definitions from an XML file in XTCE format. XTCE is a CCSDS Recommended Standard that defines an XSD Schema for validating telemetry and commanding definitions written in XML.
Yamcs supports a few other MDB types as well, and it is even possible to write your own MDB Loader. This is however an advanced topic requiring familiarity with Java. The same goes for many other features of Yamcs. For example, it is possible to extend the default services or data links with your own implementations. The class attribute in the Yaml configuration files indicates a Java-level class, which must be available on the classpath.
Packaging Yamcs
Running through Maven is useful for development and for creating prototypes, but it is not recommended for production environments. Instead bundle Yamcs together with your extensions and configurations in one integrated distribution:
mvn clean package
bundle goal of the yamcs-maven-plugin as configured in pom.xml
<project>
  ...
  <build>
    <plugins>
      <plugin>
        <groupId>org.yamcs</groupId>
        <artifactId>yamcs-maven-plugin</artifactId>
        <version>1.3.8</version>
        <executions>
          <execution>
            <id>bundle-yamcs</id>
            <phase>package</phase>
            <goals>
              <goal>bundle</goal>
            </goals>
          </execution>
        </executions>
      </plugin>
    </plugins>
  </build>
</project>
Next Steps
The typical next steps would be to:- Replace the
simulator.pyscript with your own data source - Configure the appropriate data link(s) for your data source
- Configure the Mission Database so that it matches your packet structure
For an example of advanced customizations, refer to our development testcase on GitHub.
For scripted access, have a look at the Python API.